What are Browser Checks?
Browser checks are automated tests that use real browsers to interact with your web applications. They simulate user journeys like logging in, filling out forms, making purchases, or navigating through complex workflows, ensuring your critical user paths work and perform correctly. Browser checks are perfect for detecting downtime and performance issues in:- User authentication flows
- E-commerce checkout processes
- Form submissions and user journey validation
- Frontend performance monitoring
Supported Browsers:
- Chromium: Default browser, fast and reliable
- Chrome: Google Chrome for production-like testing
- Mobile Simulation: Test responsive designs and mobile workflows
How Browser Checks Work
Checkly uses Playwright to power your Browser checks. Playwright is a robust, open-source framework for browser automation and end-to-end web application testing. It enables you to write idiomatic, reliable tests and easily control interactions within a web page. Browser checks execute automated test scripts in real browsers:- Browser Launch - Starts a real browser instance (Chromium or Chrome)
- Page Navigation - Navigates to your web application
- User Interactions - Simulates clicks, typing, form fills, and navigation
- Assertions - Validates page content, elements, and user experience
- Performance Monitoring - Captures Core Web Vitals and timing metrics
- Results Collection - Records screenshots, videos, and detailed logs
- Alerts - Triggers alerts if any of the assertions fail
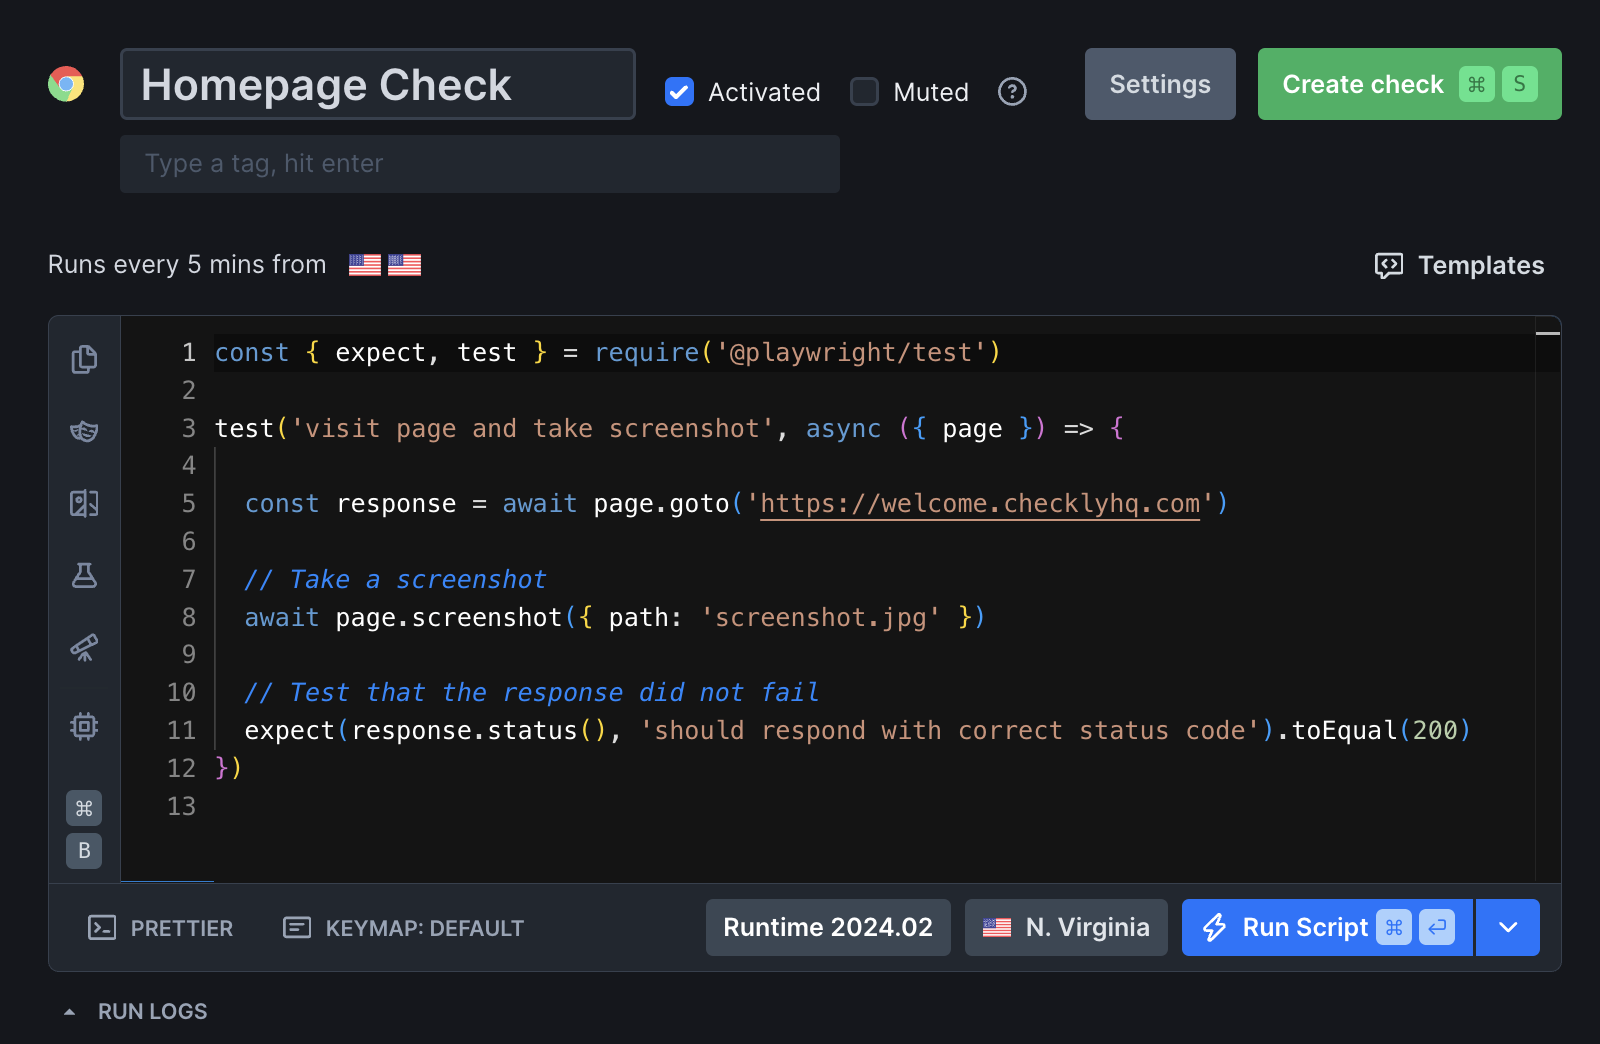
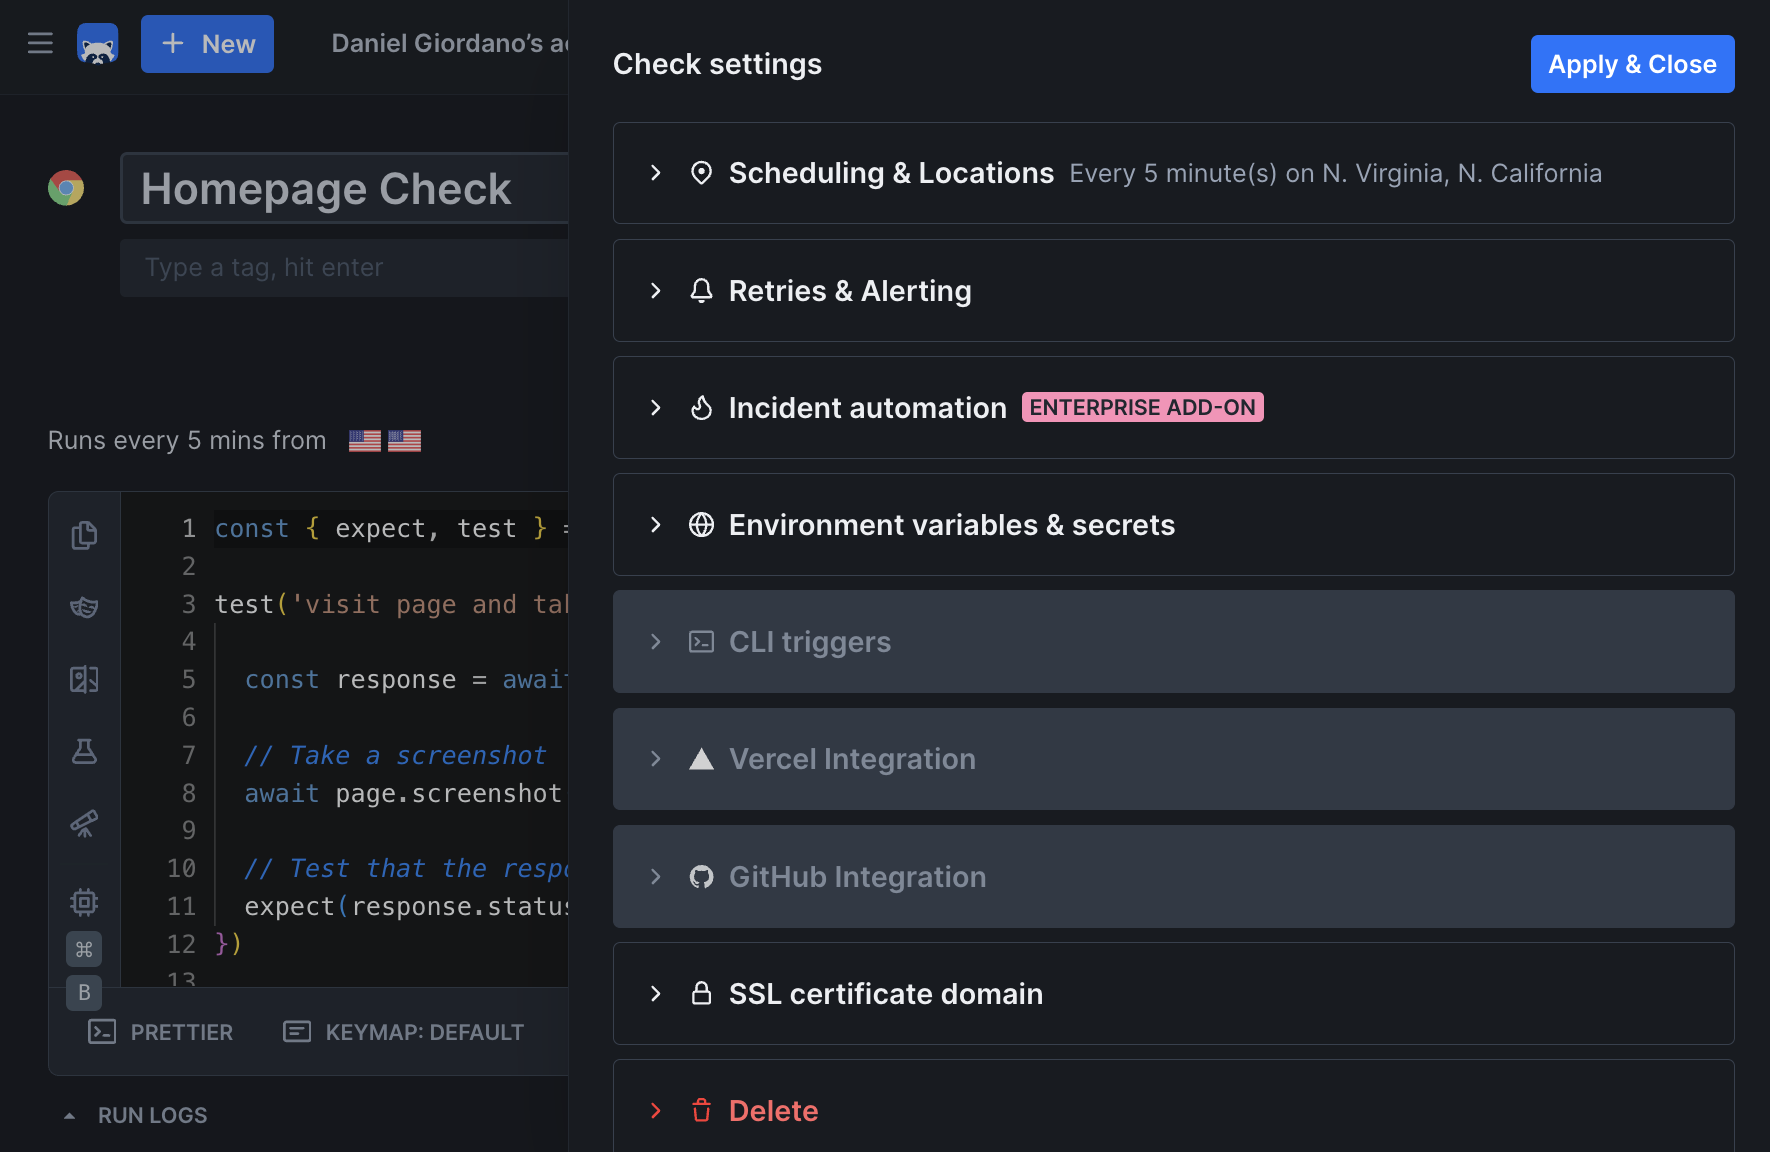
Check Structure
- Structure in the Checkly UI
- Structure in Code
To learn more about Playwright, see the our Playwright documentation.
Browser Check Results
Individual browser check results contain:-
A short check summary, including errors broken down by category

- When using Playwright Test Runner you will have an additional section displaying the test steps, error message, and assets (traces, videos, screenshots)
-
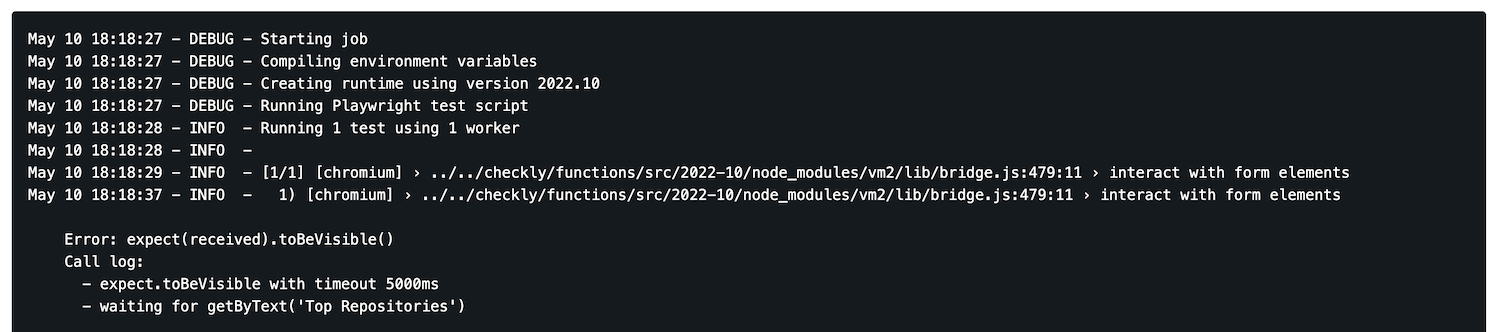
An error log, only if your script failed
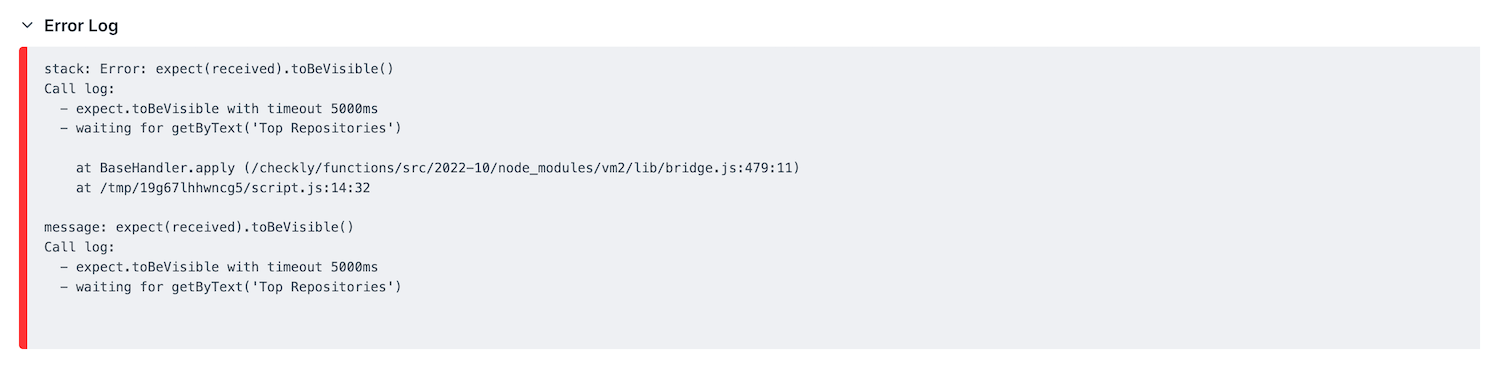
-
Expandable tabs on page your script navigated to

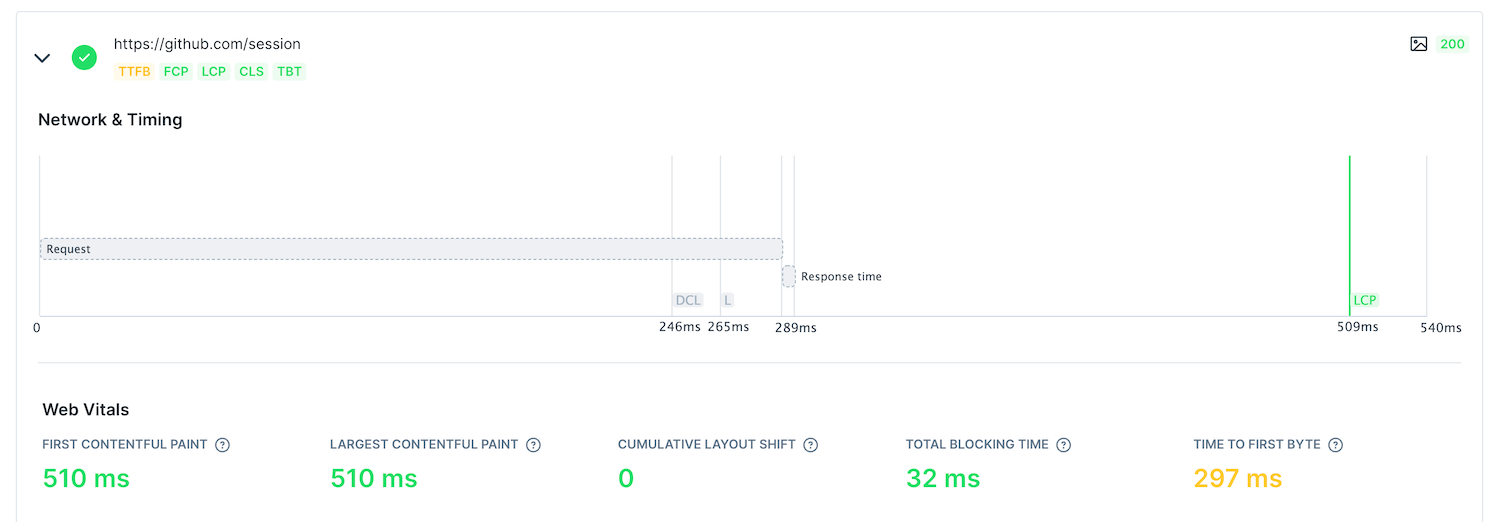
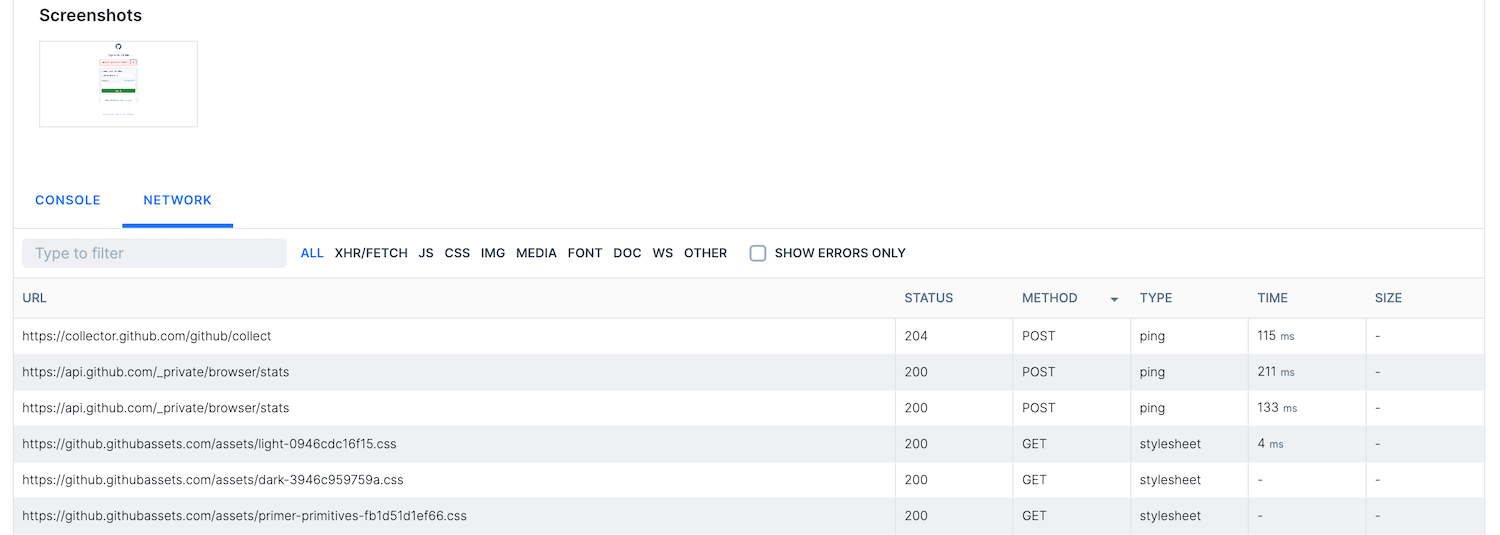
-
A job log for the check
Key Capabilities
Real Browser Automation
Real Browser Automation
Execute scripts in real Chromium browsers to test complex user interactions, JavaScript functionality, and dynamic content.
Playwright Native Support
Playwright Native Support
Write tests using Playwright’s powerful API for cross-browser automation with built-in waiting, assertions, and debugging capabilities.
Visual Regression Testing
Visual Regression Testing
Capture and compare screenshots to detect unintended visual changes in your application’s UI.
Performance Metric Collection
Performance Metric Collection
Monitor Core Web Vitals, page load times, and custom performance metrics to ensure optimal user experience.
Mobile Device Simulation
Mobile Device Simulation
Test responsive designs and mobile-specific functionality by emulating various devices and screen sizes.
Global Monitoring Locations
Global Monitoring Locations
Run checks from multiple worldwide locations to verify performance and availability across different regions.