codegen feature to record scripts effortlessly.
Step 1: Launch Playwright Codegen
To get started, you’ll use thecodegen command from the Playwright executable. Let’s say you want to create a script for interacting with Checkly. You would run the following command in your terminal:
Step 2: Interact with the Website
Now, you can start interacting with the website as you normally would. For example:- Accept cookies.
- Click a few links.
- Type “hello world” in a search box.
Step 3: Add Assertions to your tests
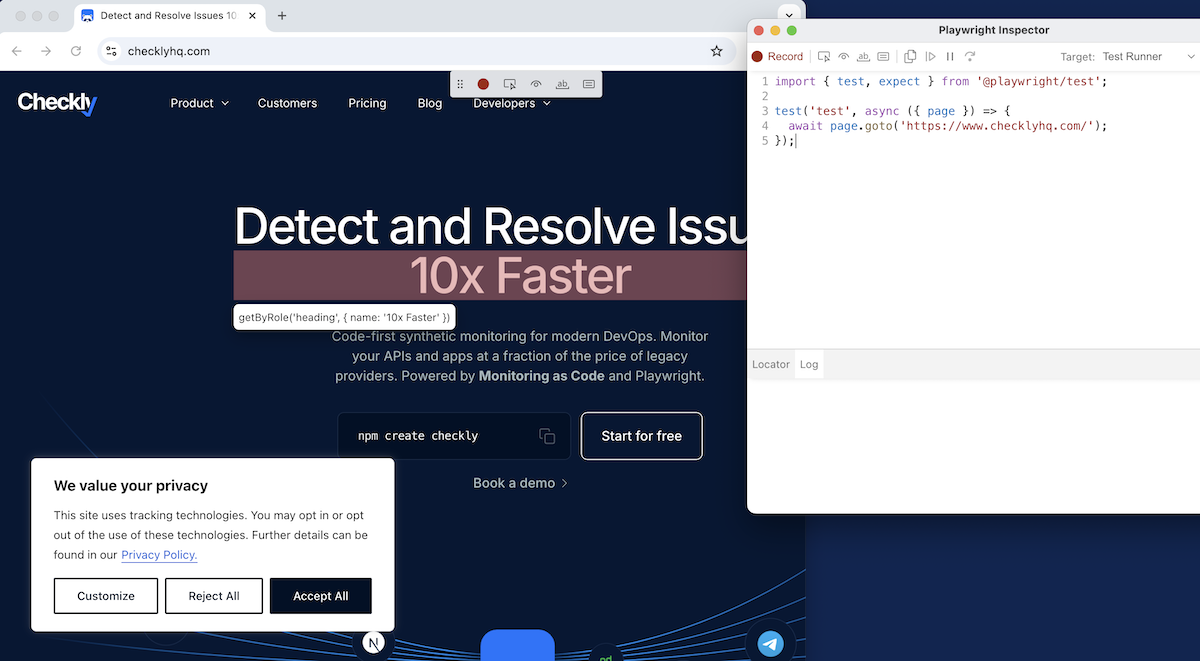
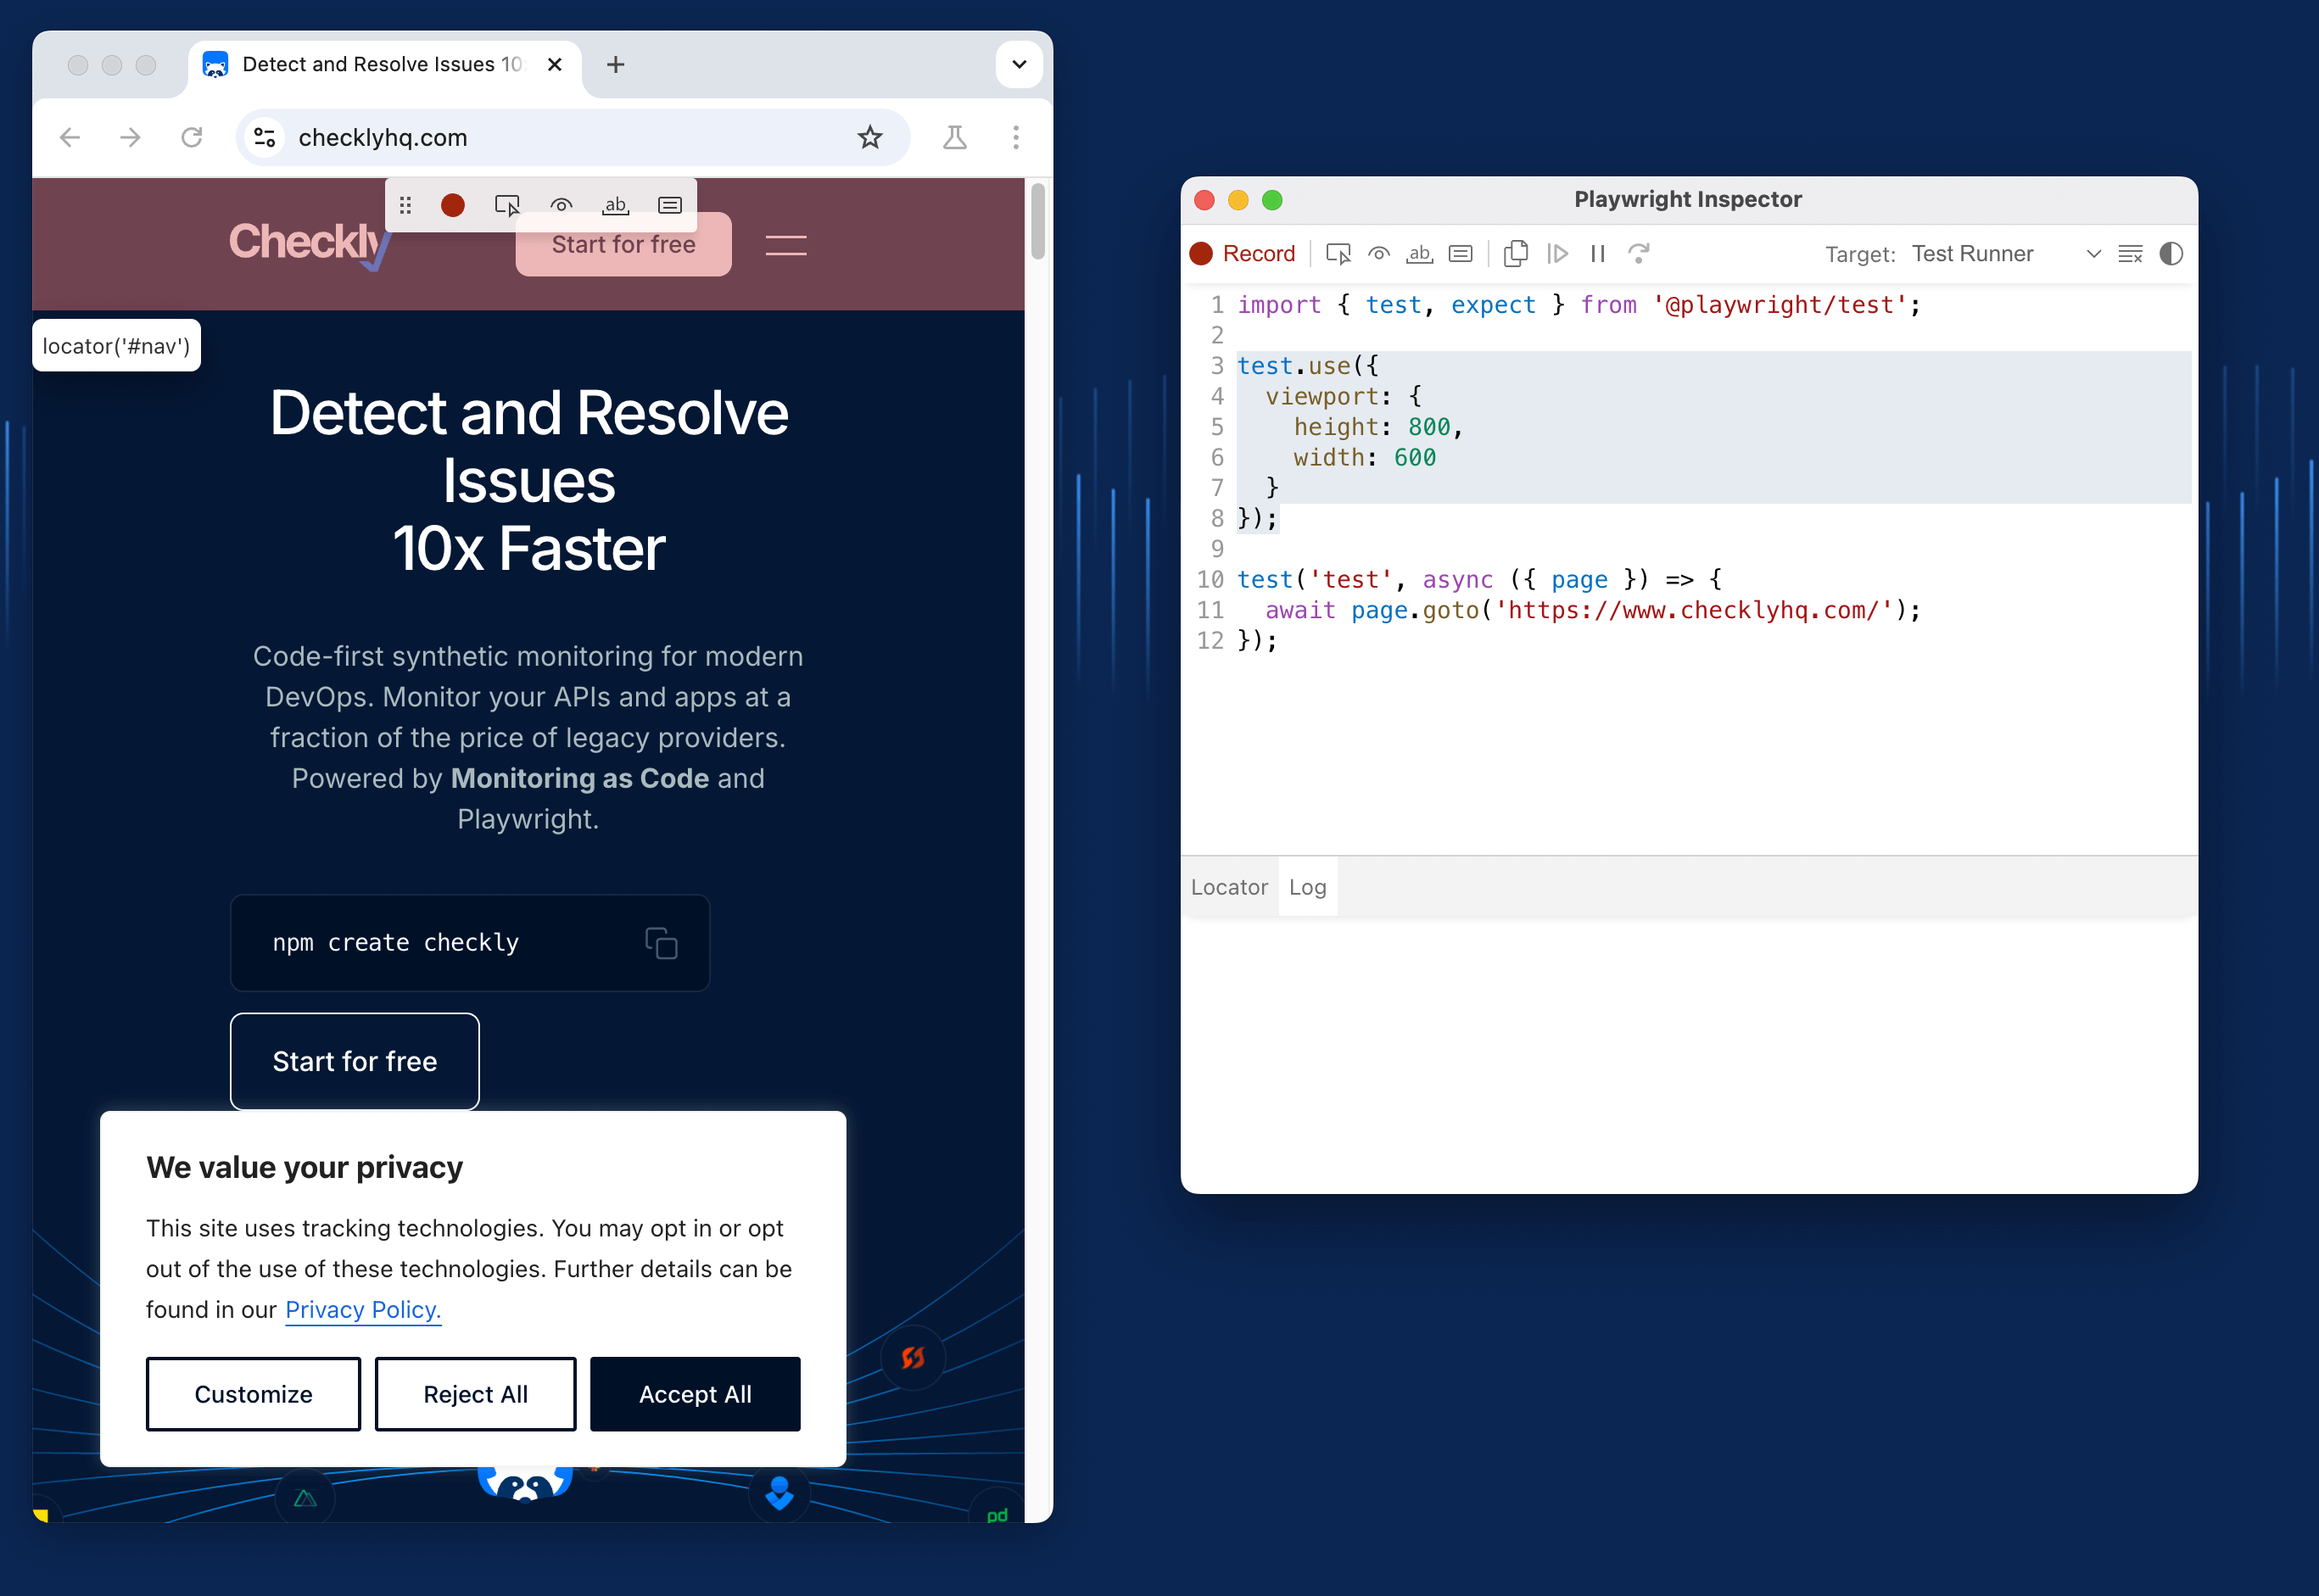
Every action in the script above has implicit assertions about the elements we interact with. Playwright will expect these elements are stable, visible, and enabled; and if one isn’t then the test will fail we could call this done, but we generally want our tests to contain assertions beyond just navigating. There are a few reasons why you should have assertions in your test: It makes it clearer to future coders what your test was checking for, and the error message is more useful from a failed assertion rather than just failing to find an element. Right now all we’ll get if the test above fails is a timeout and a line which failed. To add assertions, use the little toolbar at the top of the Chromium browser: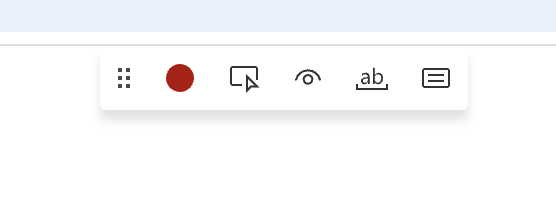
- The first button, ‘Record,’ is active at startup, and you can click it to pause the inspector’s recording of your every action in the browser
- Next is ‘Pick Locator,’ clicking this will make the locator for anything you click appear in the inspector, useful if you know how to write a test but are struggling to find a good locator for a particular element
- The 👁️ button in the middle is ‘Assert Visible’, clicking this and clicking a page element adds an assertion to our test. for example clicking the ‘book a demo’ link in the main checklyhq.com homepage gets this assertion in our test code:
await expect(page.getByRole('button', { name: 'Book a demo' }).first()).toBeVisible(); - What if we just want to make sure that a particular string appears in an element? Click the ‘Match Text’ button and you’ll get a dialog box where to enter the text you want to check for.
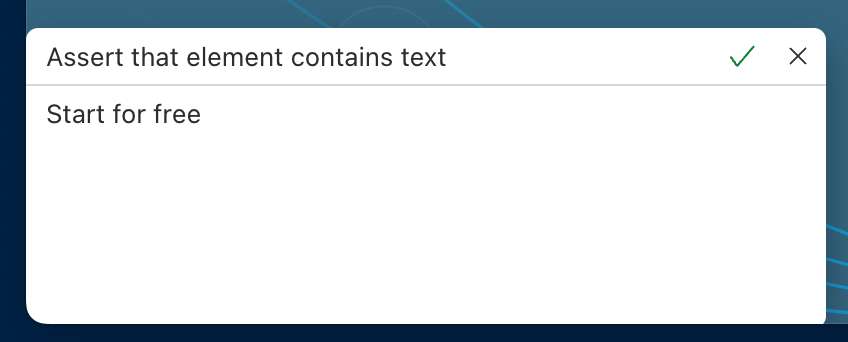
.toContainText( assertion in the inspector
- Finally the ‘Assert Value’ generates a
.toHaveValue()assertion, which is used to check that an input field has a certain value, for pre-filled inputs or for example when a user’s data should automatically be filled out in a form.
Step 4: Write tests in Java, Python, .Net or Javascript - Choose Your Target Environment
After you’re done interacting with the website, you can choose the target environment for your script. Playwright allows you to generate scripts in various languages, such as JavaScript, Python, or Playwright’s own test framework. For this example, let’s pick JavaScript. You can copy the generated script from the inspector.Step 5: Save and Run Your Script
With your script copied, you can drop the test into a Playwrightspec file, and run it with npx playwright test to see the results. Note that the script as generated contains no comments or further explanations. If you want to be considerate of your next coder, who let’s be honest is probably you in 6 months having forgotten everything about this test, add some comments, give the test a more helpful name than 'test' and divide the test into steps for readability.
Step 6: Run Your Script in the Cloud
If you want to take it a step further, use Playwright Check Suites to run your Playwright tests in the Checkly infrastructure as synthetic monitoring.Bugs don’t stop at CI/CD. Why would Playwright? 
Sign up and start using Playwright for end-to-end monitoring with Checkly.
Bonus Step 1: Add Playwright to Visual Studio Code
Many developers are now comfortable using Microsoft’s Visual Studio Code as their IDE, and Playwright has a great plugin for Visual Studio Code. Install the VS Code extension from the marketplace or from the extensions tab in VS Code.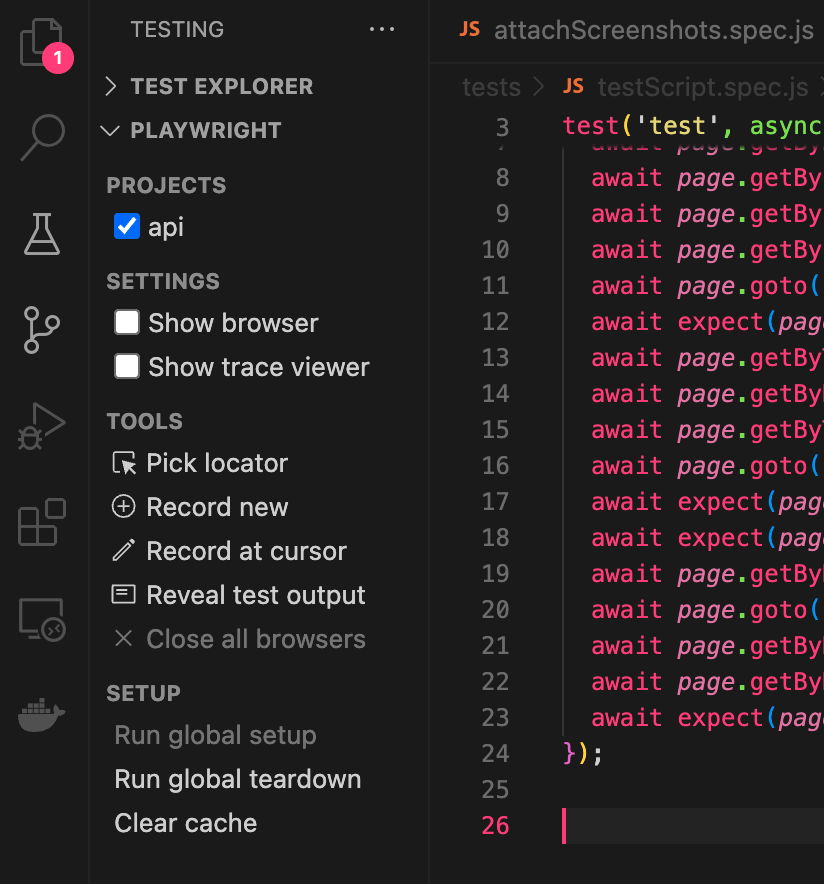
Bonus Step 2: Simulate a Mobile Browser Viewport with --viewport
Playwright can’t perfectly emulate a particular build of Mobile Opera running on a 10-year-old Android, but a good start is simulating a mobile viewport, to see if things render correctly and buttons are still visible. Start by setting your viewport size when you start up codegen:
test.use command to set the viewport. You can go quite a bit further with these settings, altering the user-agent for your test as needed to emulate different devices.
See Codegen in action
To see the highly visual codegen tool in action, check out Stefan’s video below:Go further with Playwright
You’ve just taken your first steps with creating Playwright tests. Playwright’scodegen is a powerful tool that simplifies the process of creating automation scripts. As it produces assertions and locators that are industry standard, you should use anytime you need to make a clean, readable test or automation for your site.
If you’d like to dive deeper into Playwright and Checkly’s monitoring tools, join our upcoming Kick-Start webinar to see how your end-to-end testing can grow into bullet-proof site monitoring to defend your SLA.
Bugs don’t stop at CI/CD. Why would Playwright?
Sign up and start using Playwright for end-to-end monitoring with Checkly.